





Make Unagi Glaze With a Brushable Finish
A glaze can ruin grilled eel in seconds. Too thin, and it slides straight off the fish. Too thick, and it turns tacky, dark, and heavy before the eel reaches the plate. The answer is not simply boiling longer. It is learning when unagi glaze has reached the point where it brushes on in a light, glossy layer.
For home cooks making kabayaki, eel rice bowls, sushi-style dishes, or grilled seafood, the goal is a finish that looks polished but still lets the eel’s rich flavor come through. A good brushable coating should cling to warm eel, settle into the grill marks, and leave a soft shine rather than a thick candy-like shell.
This guide explains how to manage reduction by sight, movement, and brush behavior. That makes the method useful even when cookware, batch size, and heat source differ. If you prefer a ready-made base, Eelpro’s eel sauce is designed for eel dishes and can be adjusted gently for your preferred coating style.
Start With the Finish You Want on the Eel
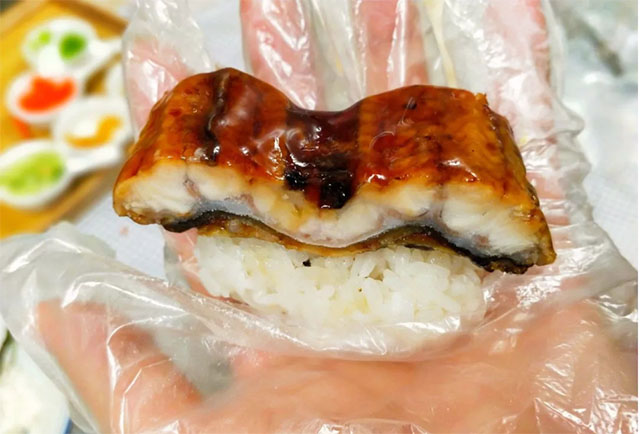
The best choice depends on the dish, not on a rule that thicker is always better. For a grilled eel fillet served over rice, a medium-bodied unagi glaze usually works best because it adds shine and flavor without soaking the rice. For sushi-style eel, use a lighter finish so the topping stays neat and does not overpower the seasoned rice. For a grilled eel skewer, a slightly fuller coating can work because the skewer is eaten immediately and benefits from visible lacquer.
| Serving Style | Best Glaze Character | How It Should Behave | When It Does Not Fit |
|---|---|---|---|
| Eel rice bowl | Light to medium body | Brushes into grill marks and leaves a clean shine | Do not use an overly thick coating if the sauce will run into the rice |
| Sushi-style eel | Light, smooth finish | Forms a thin layer without pooling at the edges | Do not use a sticky glaze that can make slicing or plating messy |
| Grilled eel skewer | Medium body with visible shine | Clings during brief finishing heat and stays on the surface | Do not keep adding layers if the surface begins to look dark and gummy |
| Grilled seafood plate | Light finishing coat | Highlights the seafood instead of masking it | Do not use a heavy eel-focused sauce on delicate seafood with mild flavor |
Use this simple conclusion: choose a thinner unagi glaze when presentation and clean slicing matter; choose a slightly more reduced finish when the eel is served hot from the grill and needs a deeper lacquer. The limit is flavor balance. Reduction concentrates saltiness and sweetness along with body, so texture cannot be judged separately from taste.
For the eel itself, start with a product that already has a clean roasted surface. Unagi kabayaki is a practical choice for home cooking because the fillet is ready for reheating and finishing rather than requiring full preparation from live or raw eel.
Control Reduction So the Glaze Clings Without Becoming Sticky or Runny
The main action is simple: reduce slowly, test the flow often, and stop before the sauce turns heavy. A brushable unagi glaze should coat the brush, travel onto the eel in a narrow ribbon, and settle quickly. It should not behave like water, and it should not sit in a thick lump on the fish.
High heat creates the most common problem. The surface reduces too fast while the rest of the sauce remains uneven. Then the glaze may look thick in the pan but melt into a runny layer once it hits warm eel. Gentle heat gives you a more reliable visual read.
| Checkpoint | What to Look For | What It Means | Corrective Action |
|---|---|---|---|
| Pan movement | The sauce moves as a flowing sheet, not like plain liquid | Body is developing | Keep heat gentle and stir around the edges |
| Spoon trail | A spoon briefly leaves a visible path before sauce closes over it | The glaze is approaching brushable consistency | Begin testing on a warm piece of eel |
| Brush test | The coating stays where brushed and does not pool underneath | The glaze has enough cling | Apply a thin layer, then return eel to finishing heat |
| Surface appearance | The eel looks glossy, not wet or gummy | The layer is balanced | Stop adding sauce and let the surface set |
Follow this brushable reduction procedure
- Choose a wide, clean pan. A wider surface helps moisture leave evenly. This suits a small home batch. It is less suitable for a large quantity, where a deeper pot may be needed to avoid splashing.
- Warm the sauce gradually. Keep the sauce moving, especially near the edge of the pan. This reduces the chance of localized sticking. Do not rush with aggressive heat, because dark residue can add bitterness.
- Watch the bubbles change. Early bubbles look loose and active. As the sauce concentrates, movement becomes slower and the bubbles appear more deliberate. This is your signal to test more often rather than to increase heat.
- Lift with a spoon or brush. Let the sauce fall back into the pan. A suitable unagi glaze falls in a smooth ribbon instead of splashing like thin broth or dropping in thick clumps.
- Brush a small area first. Apply a thin coat to the warm eel. If it runs off immediately, continue reducing gently. If it sits like paste and leaves brush ridges, it has gone too far.
- Finish with light heat. Put the glazed eel back under gentle finishing heat only long enough for the surface to shine. Long exposure after glazing can turn a good sauce sticky.
- Rest briefly before serving. Let the coating settle on the fish. Brush again only if the first layer has absorbed and the eel still looks dry.
The limit of this method is that no visual test can rescue sauce that has scorched. If the aroma turns sharp, burnt, or unpleasantly bitter, start again with a clean pan. Adding water may loosen the texture, but it will not remove a burnt taste.
Use Thin Layers Rather Than One Heavy Coat
A thin coating is easier to control. It also gives the eel a more appetizing look because the roasted surface remains visible. This is why commercial kabayaki production often relies on repeated sauce application rather than one oversized final dip. Eelpro uses a 4-layer soy-sauce coating process with defined color stages, from white-roasted eel through the final coating color, to control appearance during roasting.
At home, the same principle is useful even without industrial equipment. Brush, set, inspect, then decide whether another light coat is needed. Each layer should look intentional.
- First coat: Use it to season the surface and help the next layer hold.
- Second coat: Use it only after the first coat has settled and the eel no longer looks wet.
- Final coat: Apply sparingly for shine just before serving.
This approach fits grilled eel, especially when using frozen roasted fillets. It does not fit every dish. A saucy eel rice bowl may need extra sauce served separately so diners can mix it into the rice, rather than building an overly thick unagi glaze on the eel.
Avoid the Common Mistakes That Spoil the Gloss
Most glaze problems show up before plating. Catching them early saves the eel and prevents a second batch of sauce.
- Mistake: Reducing only by time. Different pans and heat sources evaporate at different speeds. Use brush behavior and spoon flow as the decision point instead. Time alone does not apply reliably across kitchens.
- Mistake: Brushing cold eel. A cold surface makes the sauce set unevenly and can leave a thick-looking layer. Warm the eel first. This does not mean overheating it; the surface only needs to be warm enough for the coating to settle.
- Mistake: Applying too much at once. Heavy sauce pools under the fillet and hides the roasted color. Brush a thin coat, then inspect. A heavy coat only suits diners specifically looking for a very sweet, sticky finish.
- Mistake: Using a dirty brush. Charred bits from the grill can transfer bitterness into the sauce. Keep a separate clean brush for the finishing unagi glaze.
- Mistake: Glazing too early over harsh heat. Sugars can darken before the eel is fully heated. Warm the fish first, then glaze near the end.
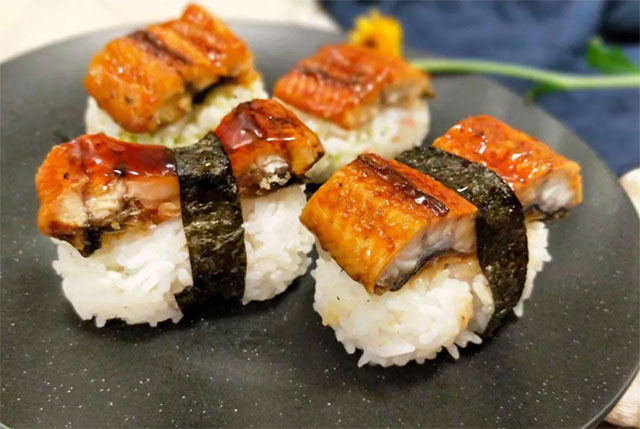
- Mistake: Forgetting the serving format. Sauce for sushi-style pieces should be restrained, while a grilled eel skewer can carry more visible gloss. The same reduction level does not suit every plate.
Kitchen fact: The most attractive shine does not come from the thickest sauce. It comes from a thin, even film reflecting light across the eel. If the glaze looks wet but does not drip, it is often closer to the ideal than a darker, heavier coating.
For a closer look at sauce balance and flavor corrections, see our kabAYaki sauce article. If your sauce tastes right but still feels difficult to brush, the issue is usually reduction control rather than the base flavor.
Match the Sauce Method to the Eel You Are Serving
Different eel formats need different handling. A thick roasted fillet can accept a little more finishing sauce than a thin sushi slice. Cut pieces heat quickly and can dry out if repeatedly returned to the grill after glazing. For shredded eel in a rice bowl, it is often better to glaze lightly and reserve some sauce for the bowl.
| Eel Format | Recommended Handling | Reason | Watch Out For |
|---|---|---|---|
| Whole roasted fillet | Warm first, then brush in thin layers | The larger surface benefits from a visible lacquer | Pooling at the skin edge |
| Cut pieces | Use a lighter coating and shorter finishing heat | Smaller pieces can become overly sauced quickly | Sticky pieces that cling together |
| Sushi slices | Brush only the top surface | Maintains clean presentation and manageable flavor | Sauce running onto rice |
| Shredded eel | Mix lightly, then add reserved sauce at serving | Improves coverage without overcooking | Dry strands from repeated reheating |
A dependable unagi glaze should support the eel, not conceal it. This matters even more when you are using quality roasted fillets with a defined surface color and soy-sauce roast profile. Eelpro supplies frozen roasted eel and can provide formats including sushi slices, strips, chunks, and cut pieces for foodservice and export buyers.
For home menus, try serving glazed eel with plain rice, cucumber, pickled vegetables, or lightly seasoned greens. These sides give the sauce room to stand out without adding competing sweetness. If you want a sushi-style application, this eel sushi roll recipe offers a useful serving direction for pairing eel with rice and cucumber.
Choose a Ready-Made Sauce When Consistency Matters More Than Experimenting
Making a sauce from scratch can be satisfying, but a prepared unagi tare is often the better choice when you want repeatable results for a family meal, catering test, or menu trial. The conclusion is practical: start with a finished sauce when flavor consistency matters, then adjust reduction carefully for the dish. Make a sauce from scratch when you want to control the flavor profile from the beginning and have time to test small batches.
Eelpro supports export customers with frozen unagi kabayaki and eel sauce produced under ISO 22000:2018, HACCP, and HALAL-certified systems. The company’s production operations include an in-house laboratory, metal detectors at critical control points, customs-registered farming bases, and cold storage for product handling. These factors matter to importers and foodservice buyers assessing traceability and supply controls; they do not replace proper storage and cooking practices in the home kitchen.
For a more detailed look at roasted eel sourcing and product options, visit Eelpro’s frozen eel supplier page. For your own kitchen, focus on the simple finish test: a good unagi glaze should brush smoothly, cling in a thin layer, and leave the eel shining rather than sticky.
Explore our kabayaki sauce recipe guide for more ways to correct sauce texture and flavor before your next grilled eel meal.
 WhatsApp
 sales@chinaeels.com
 +8619937922411