





Here Is How to Clean a Eel and Prevent the Skin from Slipping
You have a fresh, high-quality eel. You lay it on the cutting board, ready to prepare it, but the moment you try to make the first cut, it slides away. The skin is incredibly slippery, making a secure grip impossible and turning a simple task into a frustrating and potentially unsafe one. This is a common problem, but it’s solvable. The key isn't brute force; it's understanding the science behind the slime and using the right techniques for temperature and texture management.
My name is Nancy Chen, and I'm the Senior Food Safety & Quality Specialist at Eelpro. For over 12 years, I’ve managed quality control systems for seafood exports, focusing on eel. I've overseen countless processing runs and helped clients in Japan, the US, and the EU meet strict import standards. I know precisely what causes eel skin to slip and how professionals create a perfectly clean, easy-to-handle fillet. This guide will walk you through the exact methods we use to control our raw materials, explaining why the skin slips and providing a clear, step-by-step process on how to clean a eel effectively.
Understanding the Source of the Slip: Eel Slime and Skin Structure
Before fixing the problem, it helps to know the cause. An eel's skin is naturally coated in a layer of mucus, often called slime. This isn't a sign of poor quality; it's a biological defense mechanism. This glycoprotein-based coating protects the eel from parasites, bacteria, and abrasions in the water. It also helps with osmoregulation, the process of maintaining a stable balance of salt and water in its body.
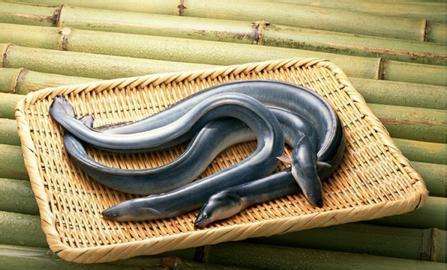
When you try to handle a fresh eel, this slime layer acts as a lubricant, making it notoriously difficult to grip. The challenge is to remove this protective coating without damaging the delicate skin underneath, which is essential for presentation and texture, especially in dishes like kabayaki. Poor handling can lead to torn skin, a messy fillet, and wasted product. At Eelpro, managing this initial stage is a critical control point backed by our HACCP system to ensure every fillet is perfect. Our process starts with sourcing from our 20 customs-registered eel farming bases, ensuring the raw material quality is high before cleaning even begins.

Troubleshooting Guide: Why Your Eel Skin is Tearing or Slipping
When you're struggling with a slippery eel, the root cause is almost always related to temperature, moisture, or grip technique. Each symptom points to a specific mistake. As a quality auditor, I diagnose these issues by observing the process. Here’s a troubleshooting framework to identify and correct your handling steps.
Use this table to diagnose the problem you're facing and apply the corrective action immediately.
| Symptom | Likely Cause | Corrective Action & Explanation |
|---|---|---|
| The eel slides away from the knife before you can even make a cut. | Insufficient slime removal. The protective mucus layer is still fully intact. | Action: Use coarse salt. Generously rub the eel's skin with coarse salt and let it sit for 2-3 minutes. The salt will bind to the slime, making it clump up. Then, scrape it off with the back of a knife and rinse with cool water. Repeat if necessary. |
| The skin feels rubbery and tears easily when you try to pin it down. | Hot water shock. You used water that was too hot to rinse or clean the eel. | Action: Use lukewarm water (40-50°C). Hot water can partially cook the delicate skin, making it brittle and prone to tearing. Lukewarm water is effective at breaking down the slime without damaging the skin's integrity. |
| You have a grip, but the eel's body twists and slips as you try to fillet along the spine. | Poor anchoring. The eel is not properly secured to the cutting board. | Action: Use an awl or a sturdy nail. Drive it through the eel's head and into a dedicated wooden cutting board. This provides a solid anchor point, preventing any rotation or slipping and allowing for precise, straight cuts. |
| Your hands keep slipping off the eel, even after removing the slime. | Excess moisture on your hands or the eel's surface. | Action: Pat the eel dry with paper towels after rinsing. Keep a dry towel nearby to wipe your hands and the knife handle frequently. A dry surface significantly increases friction and improves your grip. |
A Step-by-Step Professional Method for a No-Slip Clean
Executing the perfect clean requires a systematic approach. Rushing the prep stage is the most common mistake. Follow these steps for a clean, secure, and efficient process. This is a condensed version of the procedure our 25 quality-control specialists oversee daily in our 8,497 m² production workshop.
- Prepare Your Station: You need a large, stable cutting board (wood is best for anchoring), a very sharp filleting knife (like a deba knife), an awl or nail, a bowl of coarse salt, and paper towels. Working in a clean, organized space prevents cross-contamination and improves safety.
- De-Slime the Eel: Lay the eel in a sink or large tray. Sprinkle generously with coarse salt, covering the entire surface. Vigorously rub the salt into the skin. You will see the slime coagulate and turn white. Let it sit for 2-3 minutes.
- Scrape and Rinse: Using the back (dull side) of your knife, scrape the salt-slime mixture off the skin from head to tail. You'll be surprised how much comes off. Rinse the eel thoroughly under cool or lukewarm (never hot) running water. If it still feels slippery, repeat the salt rub.
- Dry and Anchor: Pat the entire eel completely dry with paper towels. A dry surface is critical for grip. Place the eel on your cutting board and drive the awl or nail firmly through its head into the board. The eel should now be immobile.
- Make the Dorsal Incision: Starting just behind the head, make a shallow cut along one side of the dorsal fin all the way to the tail. Your knife should run right alongside the spine.
- Make the Ventral Incision: Flip the eel over (or reposition your cut) and make a similar incision along the belly from the head to the tail, again staying close to the spine.
- Remove the Spine: With both sides cut, you can now work your knife under the spine, carefully separating the bone from the flesh. Cut through the bone at the head and tail to remove the entire spine and guts in one piece. For a more detailed walkthrough, see our complete how to cook eel: cleaning, skinning & deboning guide.
- Final Clean and Trim: You now have a butterflied eel fillet. Rinse it one last time to remove any remaining blood or viscera. Pat it dry. Trim any fins or rough edges for a clean presentation.
This method transforms the task from a slippery struggle to a controlled, precise process, yielding a perfect fillet ready for cooking.

How Professional Processing Solves Kitchen Challenges
While learning how to clean a eel is a valuable skill, it's labor-intensive and requires a dedicated setup that many commercial kitchens lack. For foodservice businesses in Japan, Germany, Poland, and the United States, consistency, safety, and efficiency are paramount. This is where a specialized supplier like Eelpro provides significant value.
Our entire operation is built to eliminate these back-of-house challenges. With an annual production capacity of 4,000 tons, we deliver fully prepared eel products that are ready to heat and serve, saving you labor costs and ensuring 100% yield.
Here’s a checklist for what to look for in a supplier to avoid the hassles of in-house eel preparation:
- Full Traceability: Does the supplier control the entire chain? We manage everything from our ~20 customs-registered unagi eeel farm for eelpro co., ltd to final shipment, with full traceability.
- Certifications: Are they certified for food safety? Eelpro holds ISO 22000:2018, HACCP, and HALAL certifications, ensuring our processes meet international standards.
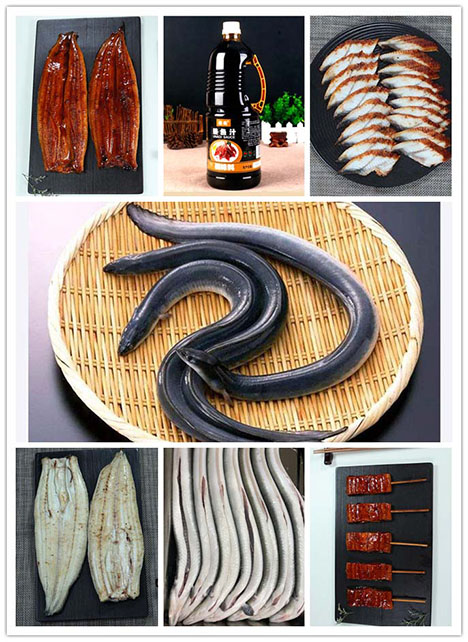
- Advanced Technology: Do they have specialized equipment? Our patented low-fat roasting and deodorizing technologies, combined with a precise 4-layer soy-sauce coating process, create a superior frozen unagi kabayaki that is difficult to replicate in a standard kitchen.
- Customization: Can they meet your specific needs? We offer custom cutting specifications, including shredding, dicing, sushi slices, and chunk-cutting, to fit any menu application.
- Export Compliance: Do their products meet your region's standards? Our products consistently meet the stringent veterinary drug residue and microbiological standards for Japan, the US, and the EU, protecting you from import risks.
By partnering with a specialized manufacturer, you bypass the most challenging parts of eel preparation, allowing your team to focus on creating excellent dishes rather than struggling with slippery raw materials.
If your business needs a reliable supply of high-quality, ready-to-use eel products that meet global safety standards, contact us to discuss your specifications and request a quote.
 WhatsApp
 sales@chinaeels.com
 +8619937922411