





Here is precisely how to clean a eel without damaging the skin
One of the most common points of failure in preparing fresh eel is the initial cleaning. The combination of a protective slime layer and surprisingly delicate skin can frustrate even experienced kitchen staff, leading to tears, improper gutting, and a final product with a muddy taste. Getting this first step right is not just about aesthetics; it dictates the texture and flavor of the final dish. As a quality specialist, I’ve seen how improper handling at this stage can compromise an otherwise premium ingredient. This guide details the professional method for how to clean a eel, ensuring the skin remains intact and the flesh is pristine, ready for any culinary application.
The process is about technique, not force. Below, we'll cover the tools you need, a detailed slit-and-rinse procedure, and the common mistakes that lead to damaged products. For commercial kitchens and food importers, understanding this process highlights the value of sourcing professionally prepared eel, where these critical steps are handled under certified food safety systems.
Essential Tools and Setup for Eel Preparation
Before you begin, organizing your workspace is critical for both safety and efficiency. A disorganized station increases the risk of knife slips and cross-contamination. It also makes the process take longer, allowing the product to sit at unsafe temperatures. Here is the exact setup our quality teams recommend for any facility handling fresh eel.
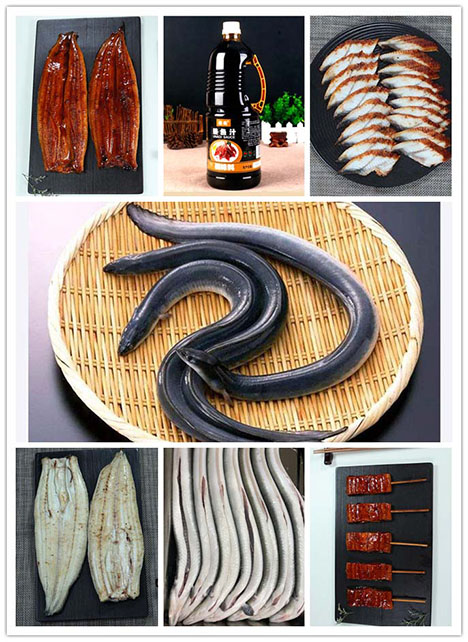
- A Long, Sharp Filleting Knife: This is non-negotiable. A dull knife will drag and tear the skin rather than slicing cleanly. The blade should be longer than the eel's width to allow for a single, smooth cutting motion. A Japanese unagi-bocho is ideal, but a standard sharp filleting knife works well.
- A Stable Cutting Board with a Nail/Spike (Optional but Recommended): Eels are notoriously slippery. Driving a small nail through your cutting board (from the bottom up, so the point is exposed) provides an anchor. You can press the eel's head onto the spike to hold it firmly in place. If this isn't possible, a firm grip with a dry towel is the next best option.
- Coarse Salt or a Vinegar-Water Solution: The natural slime on an eel protects it in the wild but is unpalatable and makes handling difficult. A generous amount of coarse salt acts as an abrasive to scrub it off. Alternatively, a dip in a mild vinegar-water solution helps break down the slime.
- A Bowl of Ice Water: This is for rinsing the cleaned eel. The cold temperature helps firm up the flesh and wash away any remaining blood or viscera without cooking the delicate meat.
- Dedicated Waste Receptacle: Keep a separate container close by for the viscera and head. This maintains a clean workspace and prevents contamination of the edible portions.
As a food safety auditor with over a decade of experience, I can't stress this enough: always work with clean, sanitized equipment. Our facilities are ISO 22000:2018 certified, meaning every tool and surface is managed under a strict sanitation protocol. Replicating this discipline in your own kitchen is the first step toward a high-quality, safe product.
A Step-by-Step Guide to the Slit-and-Rinse Technique
This technique is designed to open, eviscerate, and clean the eel's body cavity with minimal risk to the skin. It’s the foundational method used before an eel is filleted, butterflied for grilling, or cut into sections. Follow these steps exactly to avoid common errors.
The goal is a clean, open cavity with no remaining bloodline or organ tissue. Each step builds on the last, so precision is key. This is how our technicians are trained to handle raw materials sourced from our 19 certified unagi eel farms before they enter our automated processing lines.
-
Step 1: De-sliming and Immobilizing the Eel
Place the live or freshly dispatched eel in a sink or large basin. Cover it generously with coarse salt and use your hands (preferably gloved) to rub the salt along its entire body. You will feel the slime coagulate and come off. Rinse thoroughly under cold running water. The skin should now feel less slippery, almost like fine sandpaper. Next, lay the eel on your cutting board. If using a spike, press the head firmly onto the nail. If not, use a thick, dry cloth to get a secure grip just behind the head.- Key Checkpoint: The skin should be free of slime and the eel must be completely immobile before you make the first cut. Any movement will result in a jagged, uneven incision.
- Common Failure: Insufficient de-sliming. If the eel is still slippery, your knife hand or gripping hand can slip, causing injury or a ruined product.
-
Step 2: The Ventral Incision
With the eel belly-side up, locate the small vent near the tail. Using the tip of your sharp knife, make a small, shallow incision. From this starting point, slide the knife smoothly and shallowly all the way up to the head. The key is to cut only through the belly skin and muscle wall, not deep into the organs. You are simply opening the cavity, not trying to cut the eel in half.- Key Checkpoint: The cut should be a single, straight line. The internal organs should be visible but not punctured.
- Common Failure: Cutting too deeply. A deep cut can rupture the gallbladder or intestines, releasing bitter fluids and bacteria that will taint the meat. This is a critical error.
-
Step 3: Evisceration and Scraping
Spread the belly flaps open. The organs should be contained within a single membrane. Gently pull them out, starting from the head and working your way down. They should come out in one connected mass. Discard them. Next, you will see a dark line running along the inside of the spine—this is the bloodline (kidney). Use the back of your knife or a spoon to scrape it out completely.- Key Checkpoint: The body cavity should be empty and pale pink. The dark bloodline must be fully removed.
- Common Failure: Leaving remnants of the bloodline. This is a major source of "muddy" or "fishy" flavors in the final cooked product. Be thorough.
-
Step 4: Final Rinse and Inspection
Immediately transfer the cleaned eel to your bowl of ice water. Swish it around to wash away any remaining blood or tissue fragments. The cold water will also help the flesh to firm up. Run your fingers along the inside of the cavity to ensure it is perfectly smooth and clean. The eel is now ready for skinning, filleting, or being cut into steaks for recipes like a classic eel teriyaki.- Key Checkpoint: The water should be clear after the final rinse, and the inside of the eel should be uniformly clean.
- Common Failure: Using warm water. Warm or hot water will begin to cook the delicate surface of the meat, altering its texture. Always use ice-cold water.

Buyer's Checklist: Processed vs. Fresh Eel
For foodservice businesses, the decision between processing eel in-house and buying pre-processed product comes down to labor costs, consistency, and food safety risks. While fresh preparation offers a certain appeal, it introduces significant variables. At Eelpro, we produce 4,000 tons of finished goods annually, and that scale is built on eliminating these variables. Consider these points when making a sourcing decision.
| Factor | Processing Fresh Eel In-House | Sourcing Processed Frozen Eel (from Eelpro) |
|---|---|---|
| Labor & Skill | Requires skilled staff trained in eel cleaning and deboning; high labor cost and time per unit. | Zero back-of-house processing needed. Ready-to-heat or ready-to-cook, significantly reducing labor costs. |
| Consistency | Depends entirely on the skill of the individual chef. Portion sizes, deboning quality, and cleanliness can vary. | Standardized cuts (shreds, dice, sushi slices) and consistent quality guaranteed by automated lines and 25 QC specialists. |
| Food Safety | Relies on kitchen-level sanitation. Risk of cross-contamination and improper gutting is high. | Managed under HACCP and ISO 22000:2018 systems. Full traceability from farm to shipment. Our in-house eel lab tests for residues and microbes. |
| Waste & Yield | Waste from head, bones, and viscera must be managed. Actual meat yield can fluctuate. | 100% usable product. No waste, predictable yield, and stable cost-per-serving. |
| Supply Stability | Subject to fresh market availability and price volatility. | Stable, year-round supply from our 1,000-ton cold storage facility ensures consistent availability and pricing. |
Why Professional Processing Delivers a Superior Product
The manual cleaning method described is effective for small batches. However, for commercial supply chains in Japan, the US, and the European Union, it is not scalable and lacks the necessary quality controls. At Eelpro, we have built our process to solve these challenges directly.
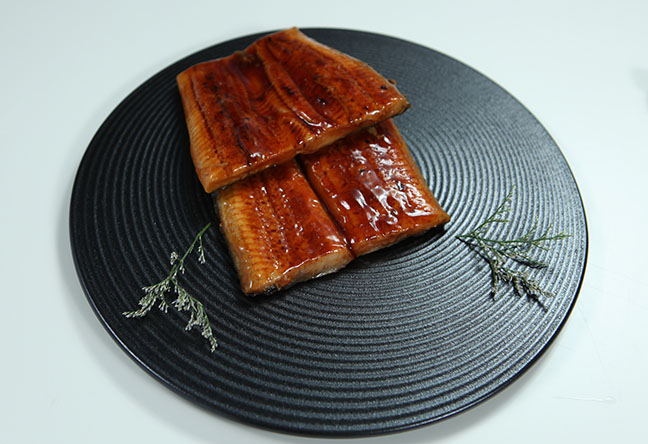
Our raw materials come from approximately 20 customs-registered eel farming bases, ensuring a clean, high-quality starting point. Once in our facility, the eels undergo a process refined by patented technology. Our low-fat roasting and deodorizing equipment addresses the very issues that manual cleaning tries to solve: eliminating muddy tastes and ensuring a clean flavor profile. The result is a product like our frozen unagi kabayaki eel, which is perfectly cleaned, deboned, and cooked with a precise four-layer soy sauce coating. This level of control is impossible to replicate consistently in a restaurant kitchen.
By providing a fully prepared product, we help our clients—from German food importers to Japanese restaurant chains—avoid trade risks associated with veterinary drug residues and microbiological indicators. Every shipment meets stringent import standards, a guarantee backed by our certifications and comprehensive quality management system.
For businesses looking to serve high-quality eel without the operational burden of in-house preparation, our ready-to-heat solutions offer the perfect balance of quality, safety, and efficiency.
If your business requires a consistent supply of expertly prepared frozen eel products that meet international food safety standards, contact our team to request a product specification sheet or a quote.

 WhatsApp
 sales@chinaeels.com
 +8619937922411