





The smell of caramelizing soy hits your nose — then panic. Your sauce is turning into tacky, bitter sludge. Again.
You’re not a line cook guessing at a recipe. You’re a restaurant operator who needs a repeatable, consistent unagi tare that won’t wreck 20 lunch covers. That’s where small-batch diy eel sauce testing earns its keep. It lets you dial in flavor, measure yield, and decide — honestly — whether homemade is worth the labor or if a premade eel sauce makes more sense.
We’ve spent years producing frozen unagi kabayaki and its classic companion sauce. And we’ll tell you straight: making unagi tare in-house is simple on paper. Making it identical batch after batch? That’s the real work. Let’s walk through small-batch testing the way a chef would — teaspoon by teaspoon, gram by gram.
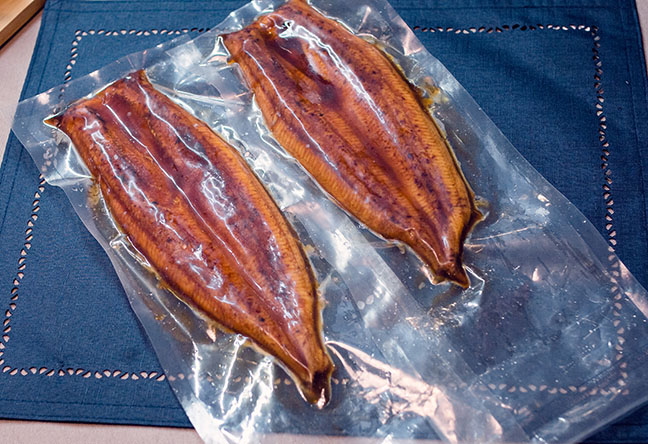
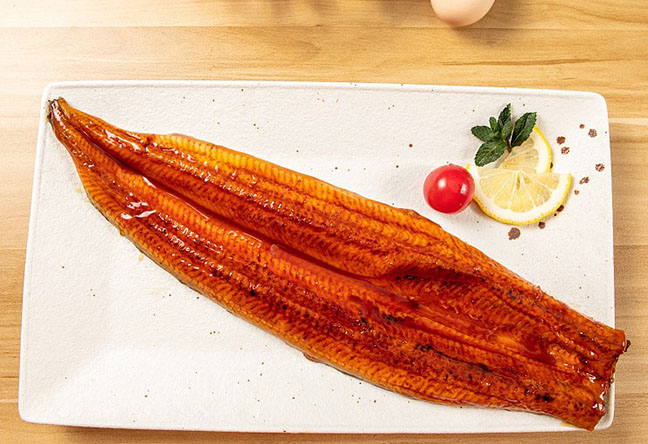
Control. When you test diy eel sauce in 1-liter or 2-liter batches, you can tweak the exact balance of salty, sweet, and umami to match your specific unagi. Some frozen fillets come pre-glazed — you might need a thinner sauce. Others arrive naked and benefit from a thick, glossy coat. Off-the-shelf tare rarely adjusts that way.
Small-batch testing also builds your staff’s palate. Once you’ve run five test iterations, everyone on the line knows what “right” looks like. If you later switch to a unagi kabayaki manufacturer’s ready-made sauce, you’ll have a rock-solid benchmark to taste against. No more “this bottle is darker than last month’s” guesswork.
Classic homemade unagi sauce relies on five building blocks: Japanese soy sauce (koikuchi), mirin, sake, granulated sugar, and time. Some kitchens add a strip of kombu or a splash of rice vinegar for brightness. The ratios look easy — 1:1:1 soy, mirin, sake, plus sugar to taste — but here’s where small-batch testing gets real.
The number-one killer of unagi sauce consistency is evaporation rate. A wide sauté pan reduces liquid faster than a tall saucepan. On a gas wok burner, your 2-liter batch can reduce by 25% in 12 minutes. On a low induction setting, the same reduction takes 40 minutes and pulls different caramel notes. The fix? Always use the exact same pot geometry and heat setting once you lock in a winning batch. Write it in the recipe: “Stainless steel rondeau, 28 cm, induction level 7, reduce for 19 minutes — target yield 1.4 L.” That kind of precision is what separates small-batch eel sauce that works from “chef’s whim” that scales poorly.
Let’s run a 1.5-kilogram test batch — enough to glaze 20 to 25 fillets. You’ll record data like a science experiment, because you are one.
Process: Combine in your designated pot. Stir until sugar dissolves on medium heat — do not walk away. Once it bubbles, drop the heat to a steady simmer. Skim the aku (grey foam) that rises; it carries bitterness. At the 12-minute mark, pull a 20 ml sample and cool it on a plate. Taste. Too sweet? Add 50 ml soy. Too thin? Keep reducing but check every 3 minutes thereafter. Target a consistency that ribbons off a spoon and holds for a second before breaking — roughly a light syrup, 45–50° Brix if you have a refractometer.
Log everything: starting weight, finish weight, reduction time, and the exact adjustments. This logbook becomes your eel sauce for restaurants playbook. Next week, when you need to replicate it for a double shift, you’ll thank yourself.
For a homemade unagi sauce test, you don’t need a combi oven or a vacuum evaporator. The essentials are simple, but skipping them invites drift.
Remember: whatever tools you test with must be the tools you’ll use later when you scale. If you borrow a different pot for the 20-liter batch, you’re starting over.
Many chefs fall for hot sauce right out of the pan. It tastes bright, sharp, and promising. The real test of diy eel sauce comes 12 hours later, chilled, then gently reheated. Flavors meld, sweetness rounds out, and any lurking bitterness from over-reduction becomes obvious.
Here’s our recommended protocol: after finishing Batch #4, divide it into four 200 ml squeeze bottles. Label them A, B, C, D. Taste bottle A immediately. Refrigerate the rest. After 24 hours, taste B cold (you’ll notice how the texture changed). Gently microwave or simmer sample C until just warm, then taste. Compare notes. If the cold sample tastes flabby, your salt/sweet ratio needs a nudge. If the reheated sample tastes flat, you may need a touch more sake or a pinch of MSG — a trick many unagi specialists use to boost umami without making it “MSG-flavored.”
This next-day discipline is how commercial eel sauce manufacturers keep their product uniform across seasons. When you find a small-batch formula that passes the 24-hour test, you’ve got a genuine house sauce.
So your 1.5-kg batch is a hit. The owner wants it on every unagi dish by Friday — 80 covers a night. How do you scale diy eel sauce for foodservice without burning a precious batch?
Go stepwise. Don’t jump from 2 L to 20 L. First multiply by 3 (6 L total) using the same pot if it fits, or a geometrically similar pot (same diameter-to-height ratio). Record the new reduction time — it will not triple; it’s nonlinear. Then multiply by 2–3 again. Expect reduction times to increase roughly 60–80% when volume doubles, depending on surface area.
Watch the sugar concentration closely. At larger volumes, sugar can settle and scorch if your heat distribution isn’t even. Stir frequently with a flat-edged wooden spatula, scraping corners. If you have a tilt skillet or a steam-jacketed kettle, you’ve got a better scaling path — but nothing replaces your initial small-batch data. Without that baseline, a large batch is a $200 gamble.
And honestly? For many kitchens, scaling past 10 liters introduces costs that make premade sauce look appetizing. A 10-liter batch ties up a burner for 90 minutes, demands constant skimming, and still needs rapid cooling in an ice bath to meet food safety codes. At some point, your labor math tilts toward buying a ready-made eel sauce that arrives consistent, shelf-stable, and perfectly matched to unagi kabayaki eel fillets. That’s not failure — it’s smart sourcing.
Start with a 1.0–1.5 kg base recipe. Use a dedicated pot, precise scale, and a logbook. After tasting immediately, test the sauce cold after 24 hours to judge true flavor. Adjust and repeat at least three times. Once you can make two identical batches a week apart, your test is done.
A heavy-bottom stainless steel pot (same one every batch), a precise kitchen scale, a timer, a fine-mesh skimmer, and ideally a Brix refractometer. A consistent heat source — induction plate with fixed wattage — is far more valuable than a high-end range. Document pot diameter, heat level, and yield weight.
Step up in modest multiples — 2 L to 6 L to 12 L — keeping the pot shape similar. Measure reduction by weight, not time. At volumes over 10 L, monitor sugar scorching and stir constantly. If scaling disrupts your kitchen flow, compare the real cost (labor + ingredients + cleanup) against a reliable premade unagi sauce that requires zero burner time.
Small-batch testing isn’t a culinary purity test. It’s your restaurant’s way of understanding flavor so you can choose wisely. At Eelpro, we supply frozen seafood, freshwater eels, and unagi tare to kitchens that care about that exact choice. Some of our customers blend our sauce with their own dashi for a hybrid — that’s another option you can only discover by testing.
Whether you end up simmering your own homemade unagi sauce or storing a shelf-stable jug under your prep counter, the weeks you spent with a small pot will make you a sharper buyer and a better chef. And if you’re ever stuck on a flavor problem, we’re just a call away — we’ve fixed enough kabayaki sauce mistakes in our eel lab to help you troubleshoot.
Ready to put your test batch to work? Grab some unagi kabayaki eel fillets, fire up that burner, and let the reduction begin. Share your Brix readings and flavor wins in the comments — we love hearing from fellow eel nerds.
 WhatsApp
 sales@chinaeels.com
 +8619937922411