





How to Reduce Home Made Eel Sauce to a Glossy Spoon-Coating Glaze
Your sauce looks thin after fifteen minutes of simmering. You keep waiting for it to thicken like the bottled stuff — but it just sits there, watery and pale. Then, three minutes later, it's suddenly stiff and grabbing at the bottom of the pan. That gap between "not yet" and "too far" is where most home made eel sauce goes wrong. The good news: the fix isn't cornstarch. It's learning to read the pan.
Traditional unagi tare thickens purely through evaporation. Sugar, soy sauce, mirin, and the eel-roasting drippings (or dashi, if you're working without them) reduce together until the water content drops enough for the liquid to coat a spoon. No starch slurry, no gums — just heat, time, and attention.
What "Spoon-Coating Consistency" Actually Means
This is the stage recipes always mention but rarely explain. Here's what to actually look for, stage by stage, without relying on a thermometer alone.
| Stage | Visual Cue | Approx. Temperature | Action |
|---|---|---|---|
| Watery | Thin, runs off spoon instantly, bubbles are large and fast | Below 100°C (212°F) | Keep reducing |
| Light syrup | Slightly slower drip, still see-through | ~103–106°C (217–223°F) | Watch closely, stir every minute |
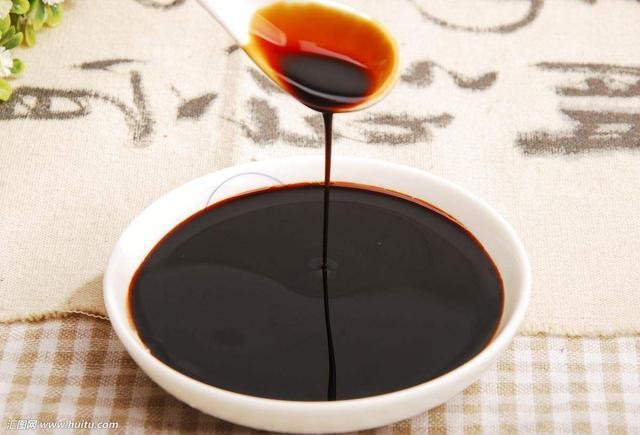
| Spoon-coating (target) | Coats the back of a spoon in a thin film, a finger swipe leaves a clean line, bubbles turn small and slow | ~108–110°C (226–230°F) | Remove from heat immediately |
| Heavy syrup | Drips in slow ribbons, sticks to spoon in a thick coat | ~112–115°C (234–239°F) | Off target — thin with a splash of dashi or water |
| Burnt sugar | Dark, sharp smell, foams instead of bubbling | Above 118°C (244°F) | Discard and restart |
The most reliable test doesn't need a thermometer at all: dip a metal spoon, let it cool for five seconds, then run a finger across the back. If the line stays clean without the sauce flowing back in, you've hit spoon-coating consistency. If the sauce refills the line instantly, it needs more time. This works because home made eel sauce thickens through sugar concentration and gentle protein bonding from the soy sauce — the same reason it will keep thickening slightly as it cools, so pull it a touch earlier than you think you need to.
Step-by-Step Reduction Process
- Combine equal-ish parts soy sauce, mirin, sake, and sugar in a heavy-bottomed pan. A thin pan causes uneven hot spots and scorching at the edges before the center reduces — this is the single biggest cause of failed batches.
- Bring to a gentle simmer, never a rolling boil. A hard boil evaporates liquid unevenly and can scorch sugar along the pan walls before the center is ready. Checkpoint: bubbles should be small and steady, not violent.
- Stir every 2–3 minutes in the first half of reduction, then every 60 seconds once the liquid visibly darkens. Failure reason at this stage: walking away during the last five minutes — this is exactly when the sauce moves from watery to burnt in under two minutes.
- Watch for the color shift. The sauce should deepen from thin brown to a glossy mahogany. If it turns matte or starts foaming heavily, it's overshooting into scorch territory.
- Run the spoon test once bubbles slow down and the surface looks slightly syrupy. Do this every 60 seconds near the end — the difference between perfect and burnt is often less than 90 seconds of heat.
- Pull the pan off heat the moment it coats the spoon, and set the pan on a cool surface (not the same burner grate) to stop carryover cooking immediately.
Common Mistakes That Ruin the Glaze
- Adding cornstarch to "help it along." This masks the real reduction point and gives a cloudy, gluey texture instead of a clean glaze.
- Using a thin aluminum pan. Heat spikes unevenly, so the edges scorch while the center is still thin.
- Judging thickness while the pan is still hot. Sauce always looks thinner on the stove than it will once cooled — always test off-heat.
- Reducing over high heat to save time. This concentrates bitterness from the soy sauce faster than the sugars can balance it, leaving a harsh aftertaste.
- Skipping the taste check. Reduction concentrates saltiness fast — taste at the light syrup stage, not after it's already thick.
Home Made Eel Sauce vs. Ready-Made Kabayaki Sauce — When Each Makes Sense
For a weeknight dinner or a small dinner party, reducing your own sauce is genuinely the better move — it's cheap, quick, and satisfying to watch come together. For catering volume, or when consistency across hundreds of servings matters, the calculation changes.
| Scenario | Home Made Eel Sauce | Commercial Unagi Tare |
|---|---|---|
| Small batch, home kitchen | Ideal — full control over sweetness/saltiness | Overkill for one meal |
| Restaurant service, daily volume | Time-consuming, batch-to-batch variation | Consistent viscosity and flavor every time |
| Export or wholesale foodservice | Not practical at scale | Manufactured under controlled soy-sauce coating layers for repeatable results |
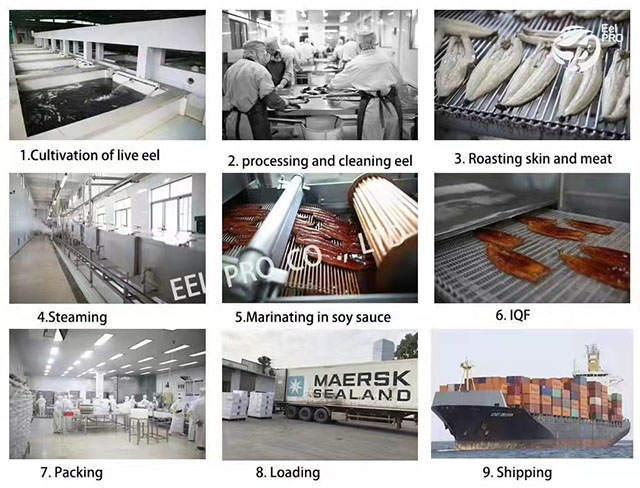
Producers working at scale solve the consistency problem differently. Our own eel sauce production uses a 4-layer soy-sauce coating process with temperature-controlled steps at each stage, so the same spoon-coating viscosity is repeated batch after batch — something that's genuinely hard to guarantee by hand, even for an experienced cook. If you're testing recipes for a menu rather than a single dinner, it's worth reading how that process fixes common flavor drift in our guide on fixing kabayaki sauce flavor mistakes.
A Buyer's Decision Checklist for Sourcing Ready-Made Sauce
- Do you need the same viscosity across every batch, or is some variation acceptable?
- Are you serving eel dishes daily, or occasionally?
- Do you have staff time to babysit a reduction pot during service hours?
- Does your kitchen need food-safety documentation for imported sauce components?
- Would boneless, pre-glazed unagi kabayaki save more labor than making sauce alone?
Cold Knowledge: Why Tare Gets Better With Age
Here's something most home cooks never learn: authentic unagi tare in Japan is traditionally kept and topped up over years, not made fresh each time. Every batch of grilled eel drippings added back into the pot deepens the flavor through repeated Maillard reaction layering. Your first home made eel sauce won't taste like a restaurant's fifty-year-old tare — and that's fine. But saving a small amount of finished sauce to use as a flavor base for your next batch gets you noticeably closer over just a few rounds.
If you want a make-ahead approach that holds well in the fridge without breaking down, our eel sauce recipe with storage tips covers reheating without losing the glaze's shine. And once your sauce is dialed in, pairing it correctly matters just as much — see our notes on donburi topping ideas for ways to use the glaze beyond grilled eel.
Storage and Reheating Without Losing the Glaze
Store cooled sauce in a sealed glass jar, refrigerated, for up to two weeks. When reheating, warm it gently over low heat rather than microwaving in short bursts at full power — uneven heating can cause the sugars to separate slightly, giving a grainy edge instead of a smooth glaze. If it's thickened too much in the fridge, loosen it with a teaspoon of water or dashi rather than reheating longer, which risks pushing it back into scorch territory.

For readers building full eel dishes around this sauce, our guide on cleaning, skinning, and deboning eel pairs well with this glaze once you're ready to grill your own fillets rather than working from pre-cooked kabayaki.
If you'd rather skip the guesswork of home reduction for a catering menu, we can send a spec sheet or a sample of our ready-made unagi tare — just reach out with your target volume and we'll walk through what fits your kitchen.

 WhatsApp
 sales@chinaeels.com
 +8619937922411